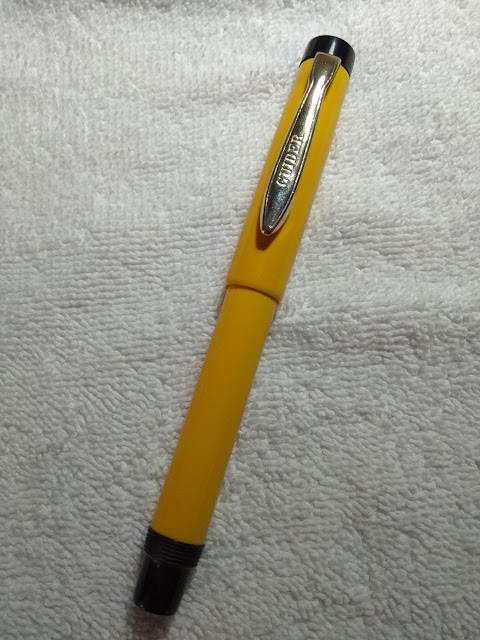
Guider Pen Works, Rjy, one of the oldest surviving fountain pen makers in India, was established in 1946 by Mr. G Subbarao. The company is now run by his son Mr. G Laxmana Rao. Till a short while back they still had vintage celluloid rods/tubes that the founder had imported all the way back in the late 1940s.
During my visit in late 2017, I had broached this topic with Mr. Rao and he told me that all rod stocks had been used up and the finished and unfinished pens that he had were the last batch, comprising mainly of the yellow celluloid. Sometime before my visit I had already acquired a couple of these in the yellow celluloid material.
Sometime
back I was informed that these pens made by Guider, were of that particular type of celluloid and that it degrades very fast,
especially when in direct contact with ink, given its age and conditions of
storage. This one being an eyedropper, would be at risk if it was used
frequently.
Yusuf
ji very kindly converted one of the pens to an
aerometric filler early this year, and that inspired me to think how I
could do the same for the other one.
This pen is a small one and a
setup that is used by common Chinese pens would not fit, so I needed to
construct something customized for this pen. The following pics
illustrates my attempt. Please look at the pics and description attached to each of the images and follow the step-by-step process.
 |
| 01. The Guider celluloid, the subject of my experiment. This material is apparently about 70-odd years old. |
 |
| 02. The pen uncapped. |
 |
| 03. Finding a suitable part of an old ball pen for a makeshift nipple that will attach to the ebonite section on the inside. |
 |
| 04. The parts all lined up to illustrate how they will all come together. |
 |
| 05. The sac (taken from a cheap discarded Chinese pen) has been fitted to the plastic tube shown earlier. |
 |
| 06. The inner diameter of the section needs widening to accommodate the
thinner end of the nipple. Coincidentally, the outer diameter of the
nipple is the same as that of the feeder. I manually drilled with a suitable drill-bit, (very slowly!) until the white end was fitting snugly into the section. |
 |
| 07. Measurements were carefully taken to ensure minimum margin of error. |
 |
| 08. This shows the sac+nipple fitted into the section on the barrel side.
The nipple needs to be shortened since it is a bit too long. I wanted to
make sure that the aerometric unit was as short as possible. |
 |
| 09. The nipple cut to size. |
 |
| 10. The end sanded down to make sure there are no jagged edges. I used a 1500 grit sandpaper. |
 |
| 11. Ensuring that it's a snug with with enough space for the feeder to be installed. |
 |
| 12. All (ok, most) of the parts coming together. |
 |
| 13. I applied a bit of silicone grease to the edge between the section and
the nipple to ensure a no-leak fit. The nipple is snug enough to require
a certain bit of pressure to pull out from the section. |
 |
| 14. The outer metal jacket needed to be cut to the size of the sac. This
part came from a Pilot converter. I used a hacksaw and rough sandpaper
to smooth the edges. |
 |
| 15. All done! Now to see if it works! |
 |
| 16. It draws liquid! Success! |
The following images were added in August 2020 as comparison between the two yellow Guider celluloids in my possession.


